Task 5. Assemble the washer
-
Select Component Assemble
 icon in the right side toolbar.
 -
From the Open dialog box, select WASHER.PRT as the part to assemble and select Open. The washer model will appear in the graphics window in yellow to represent the part being assembled.

The component can be moved independent of the assembly model by using the following mouse and key combinations:
-
Press and hold CTRL+ALT and LEFT-DRAG - Drags the component
-
Press and hold CTRL+ALT and MIDDLE-DRAG - Spins the component
-
Press and hold CTRL+ALT and RIGHT-DRAG - Pans the component
-
-
Press and hold both the CTRL+ALT
and RIGHT-DRAG to d rag the washer over near the lower left hole of the transmission cover as shown in the figure below. Release the buttons when the washer is in position. 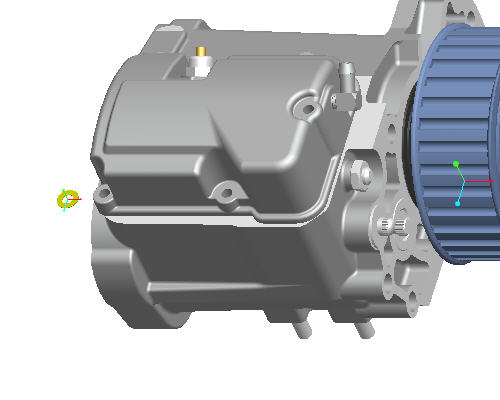
-
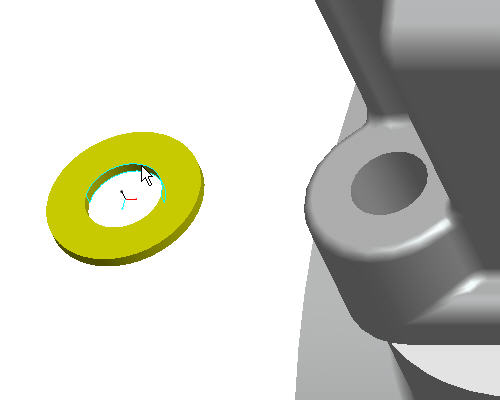
Orient the model to better select the lower left hole on the transmission cover. Roll the scroll button toward you to zoom in. Use SHIFT + MIDDLE-DRAG to pan the model to the center of the screen. Use MIDDLE-DRAG to rotate the model.
-
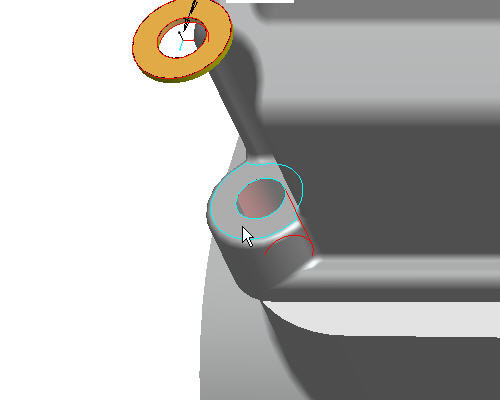
Select the inside cylindrical surface of the washer as shown in the figure below.
-
Select the cylindrical surface of the hole in the transmission case as shown below. The washer should now be in line with the hole as the first constraint.
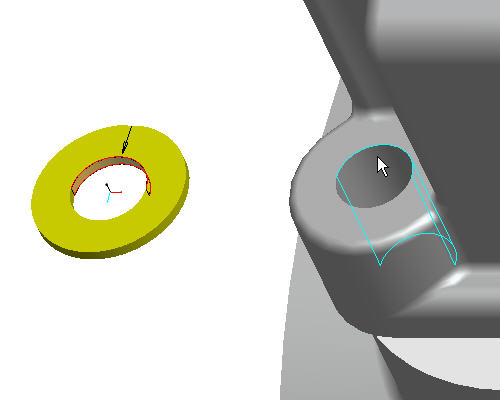
- Select the top surface of the washer as shown in the figure below.
-
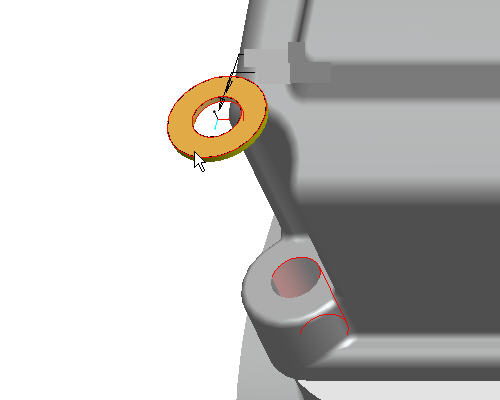
Select the top surface of the hole on the transmission cover as shown below. Notice how the washer has been placed inside the cover due to the top of the washer being aligned to the top of the cover.
-
Select the Component Placement Flip
 icon from the dashboard to change the constraints orientation. Notice how the washer has now been flipped over and is in the correct orientation.
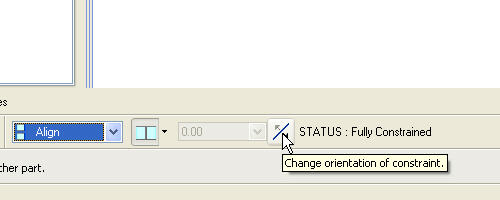
-
Select Complete Component
 from the dashboard.
 -
Select Repaint
 icon on the main toolbar.
 -
Select CTRL+D to reorient the model into the default orientation.