 |
|
|
Using Centerlines in a Sketch
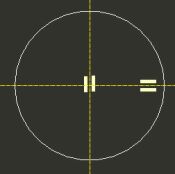
Centerlines promote symmetry when sketching. In this example, we want a rectangle to be sketched symmetrically about the vertical and horizontal references. Centerlines display as a yellow dashed line. |
|
| Task 2-7. Sketch on the previous datum plane. Begin by sketching a symmetric rectangle. |
- In the Sketch dialog box, notice that datum plane DTM1 is automatically selected as the Sketching Plane.
- Click Sketch from the Sketch dialog box.
- Click Datum Planes
 from the main toolbar (top of the screen) to disable their display. from the main toolbar (top of the screen) to disable their display.
- Click No Hidden
 from the main toolbar. from the main toolbar.
- Notice the two dashed lines, these are sketcher references. Sketched geometry will snap to these references.
-
Sketch centerlines and a rectangle as shown in the following figure:
- Click the black arrow on the Line Types Flyout
 in the sketcher toolbar (right of the screen), and select Centerline in the sketcher toolbar (right of the screen), and select Centerline  . .
- Click two locations on the vertical sketcher reference to sketch a vertical centerline.
- Sketch another centerline on the horizontal sketcher reference, as shown in the following figure on the left.
- Click Rectangle
 from the sketcher toolbar (right of the screen). from the sketcher toolbar (right of the screen).
- Click and release to select a location for the upper left corner of the rectangle.
- Allowing the rectangle to snap to symmetry, click and release to select a location for the lower right corner of the rectangle. Refer to the following figure.
|
 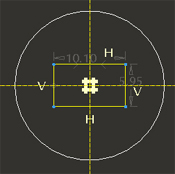
Sketching Centerlines and a Rectangle |
|
|
|
Always use a 'click-and-release', 'click-and-release' technique when sketching geometry, as opposed to holding down the left mouse button and 'dragging'. |
| |

