Task 6. Create the first solid feature as a revolve of the side sketch
|
|
Creating solid geometry normally involves sketching a shape and extruding, revolving or sweeping it. Using a 2D view from a drawing is no different. In this task we'll revolve a portion of the side view around an axis to create a solid. |
|
|
The revolve feature will require an axis to revolve about. We can create the center axis before or after the sketch is created, for simplicity we will create the axis first. |
-
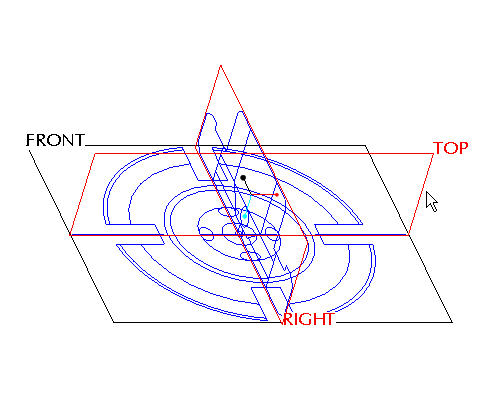
Left click on the RIGHT datum plane in the window.
-
Press and hold CTRL key on the keyboard and left click on the TOP datum plane. Note both will turn red when it is selected as shown in the figure below.
-
Click Create Datum Axis
 icon on the right side toolbar.

Do not confuse the datum creation tools usually located on the right side toolbar with the datum visibility tools usually located on the main toolbar. Notice that the visibility tools have a small eye on them -- for example
 instead of .
 -
Right click on FRONT-SECTION from the model tree and select Hide to reduce confusion while creating the revolve shape.

We do not want to revolve the entire sketch, but only a part of it, so we'll use what is already there as the basis for a new sketch.
-
Left click on the RIGHT datum plane in the window.
-
Click the Sketch Tool
 icon on the right toolbar to create a sketch.
 -
In the Sketch dialog, accept the select references and select Sketch button to close the dialog.
-
Click the Datum Planes
 icon to hide the datum planes.
 -
Select the Use Edge
 icon from the sketch toolbar. In the Type dialog, select the Single option.
 -
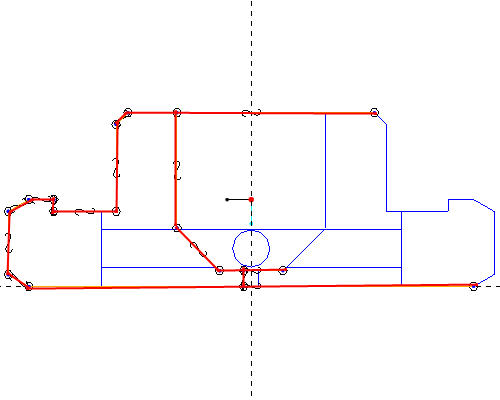
Left click to select the 14 edges highlighted in red in the figure shown below.
-
Select Close from the Type dialog.
-
Click the Dynamic Trim
 tool and left click to select the locations shown in the figure below to close the shape.
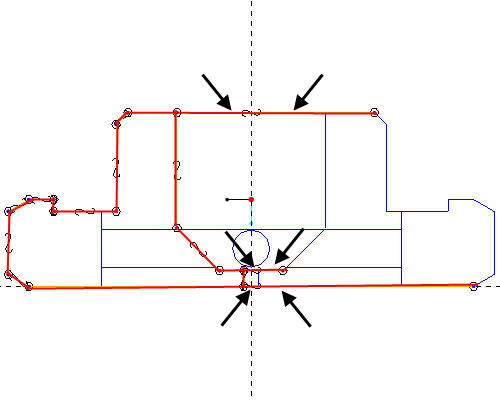
-
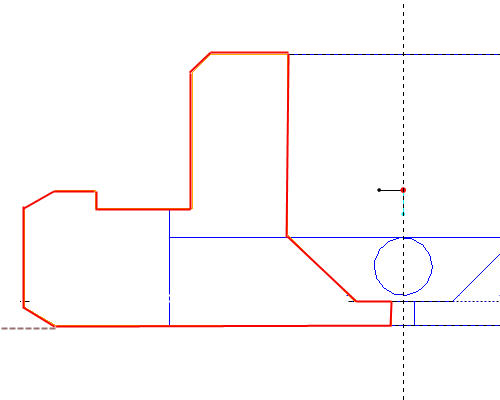
The close shape will appear in the figure below.
-
Click Complete Sketch
 on the right side toolbar.
 -
Click CTRL+D to return to the default view.
-
With the sketch still selected, click the Revolve
 tool on the feature toolbar.
If the sketch is not highlighted in red, select the sketch from the model tree.
-
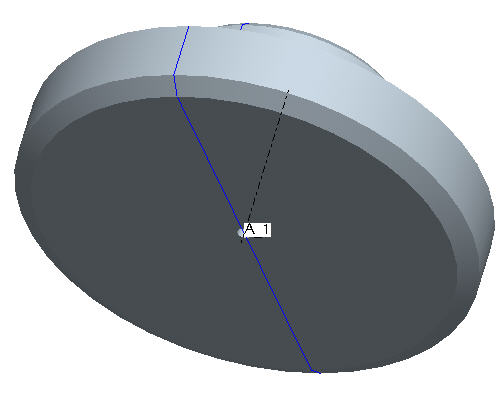
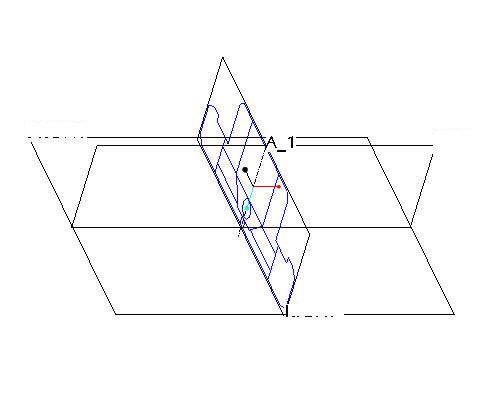
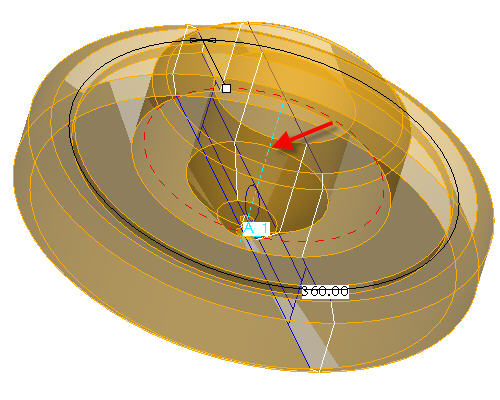
Left click to select the axis A-1 as shown in the figure below.
-
Click the Complete Feature
 icon in the dashboard.
 -
Press CTRL+D on your keyboard to see the default view of your model.